Tutorial 3
Extend a STRING protein-protein interaction network with pathway associations
CyTargetLinker provides a quick and extensive enrichment of networks in Cytoscape. The visualization options allow interpretation of complex networks in a graphical way.
In this tutorial, a step-by-step explanation is given on how to extend a STRING protein-protein interaction network with biological pathway information from WikiPathways. The tutorial was created for the following versions:
- Cytoscape v3.7.1
- CyTargetLinker app v4.1.0
- STRING app v1.4.2
Step 1: Install required apps in Cytoscape
- Open Cytoscape
- Go to the app manager: Apps -> App Manager
- Install the stringApp and CyTargetLinker apps
Step 2: Load Protein-Protein Interaction network from STRING
- First you will need to create a protein-protein interaction (PPI) network in Cytoscape with relevant proteins for open-angle glaucoma.
- In the search bar in Cytoscape, select the STRING disease query and search for “open-angle glaucoma”.
- Select a confidence cut-off of 0.4 and a maximum number of proteins of 25.
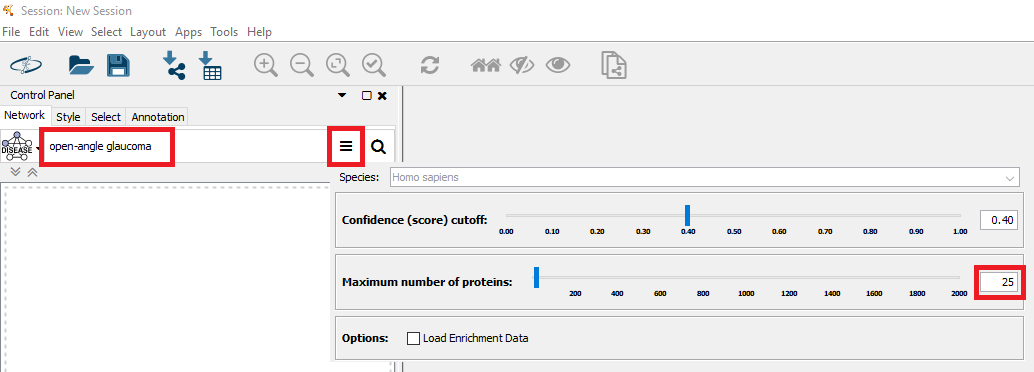 Figure 1 |
An additional window pops up to further define the query disease. Simply click “Import”.
The resulting PPI network is created as shown in Figure 2.
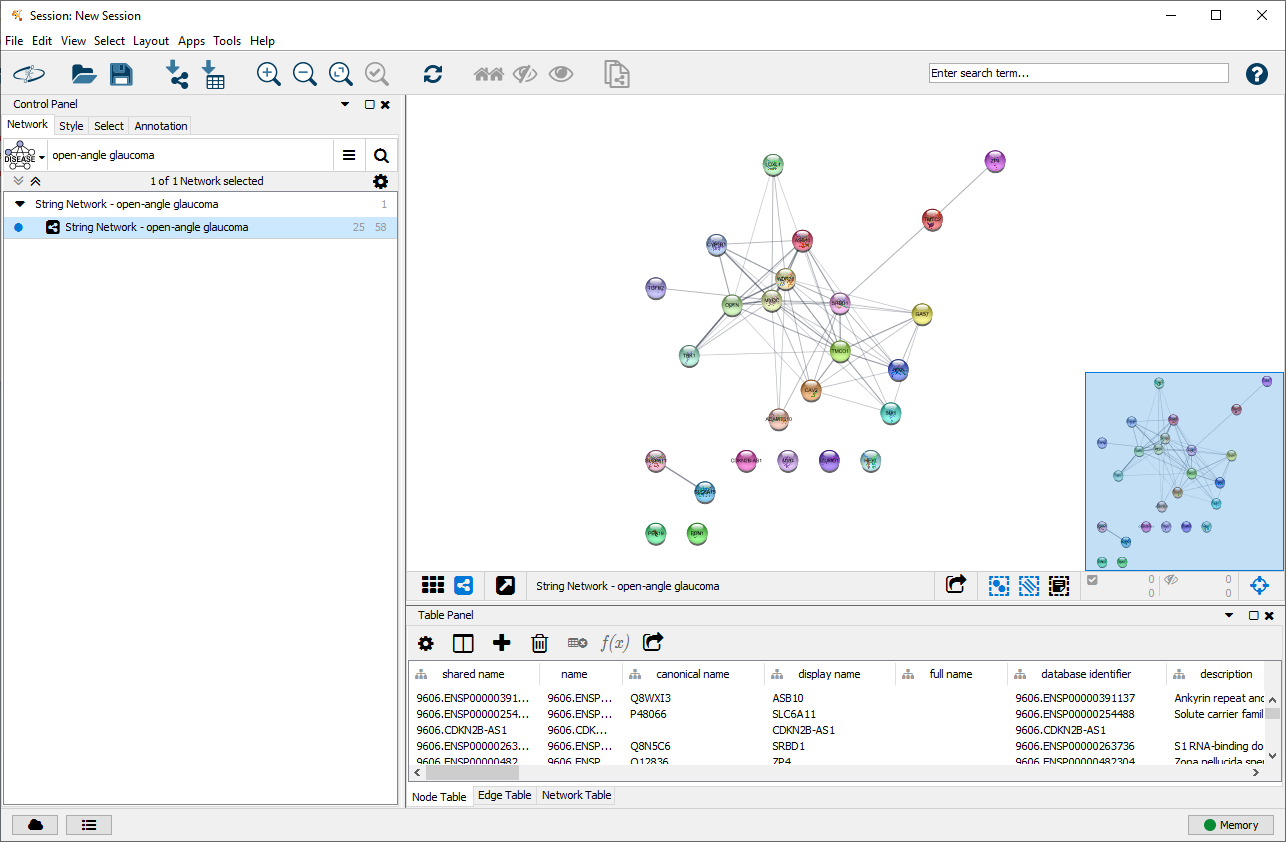 Figure 2 |
Step 3: Download pathway-gene association linksets
A linkset is a network containing additional information and links about nodes in the network. This could be regulatory interactions like microRNA-gene interactions or other associations like gene-pathway links. The networks are stored in XGMML (the eXtensible Graph Markup and Modeling Language) format, which is supported by Cytoscape. Each linkset contains interactions consisting of two nodes, source and target, connected through one directed edge. Several linksets for different use cases, species and interaction types are provided on our website, see Figure 3. CyTargetLinker is not limited to the provided linksets. A user can also easily create their own linksets.
Before starting CyTargetLinker you need to download the linksets of interest and store them in a directory. In this example, we will use gene-pathway associations from WikiPathways. An edge between a gene and a pathway indidicates that the gene plays a role (is present) in this pathway. For this tutorial, you can download a zip file containing the linksets from here.
- Download the zip file and unzip it so both xgmml files are in the tutorial3-linksets directory.
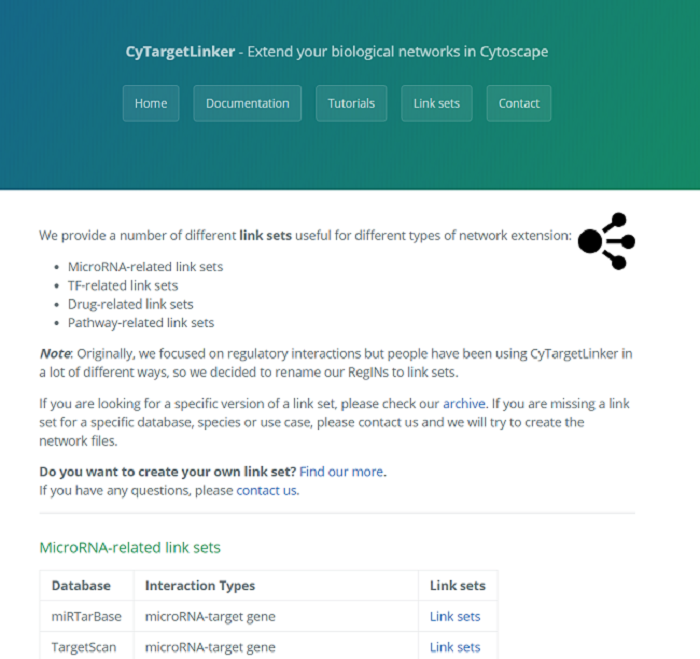 Figure 3 |
Step 4: Extend network in Cytoscape
- Go to ‘Apps -> CyTargetLinker -> Extend network’ (see Figure 4)
- Select the correct elements in the drop-down boxes for user network and network attribute. The user network is the network you want to extend. The network attribute is the column that is used to identify the entities in the linkset and needs to contain one of the supported identifiers. The gene-pathway linkset supports HGNC symbols, so we can select the ‘display name’ column.
- Browse to the downloaded tutorial3-linksets directory to select the linksets used for extension.
- Select ‘BOTH’ as direction.
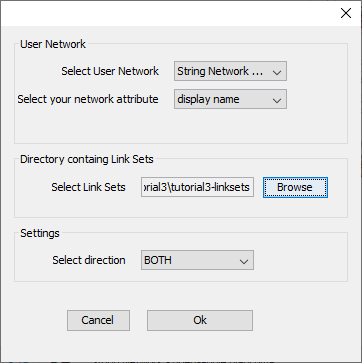 Figure 4 |
After clicking ‘OK’, you can select which of the linksets in the folder should be used - in this tutorial, we will only use the available linkset (Figure 5).
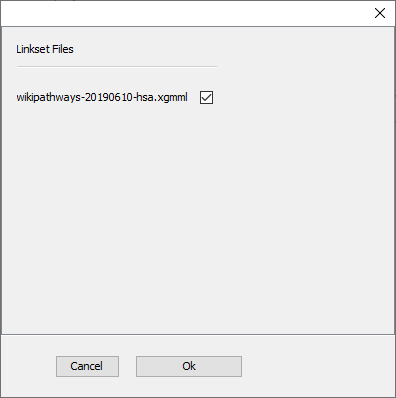 Figure 5 |
After the extension (this might take a little while depending on the size of the original network and linksets), the extended network is visualized in a new Cytoscape network, as shown in Figure 6. Go to ‘Apps -> CyTargetLinker -> Show result panel’ to see how many interactions are added from which linkset. A pop-up box appears that says Show/hide Result Panel. Make sure the box is checked and press ok. In the Results Panel, select CTL_String Network – open-angle glaucoma (SUID:956) from the drop-down box. For the current extension 63 edges from WikiPathways were added.
Initial proteins are shown in gray and pathways are shown in purple.
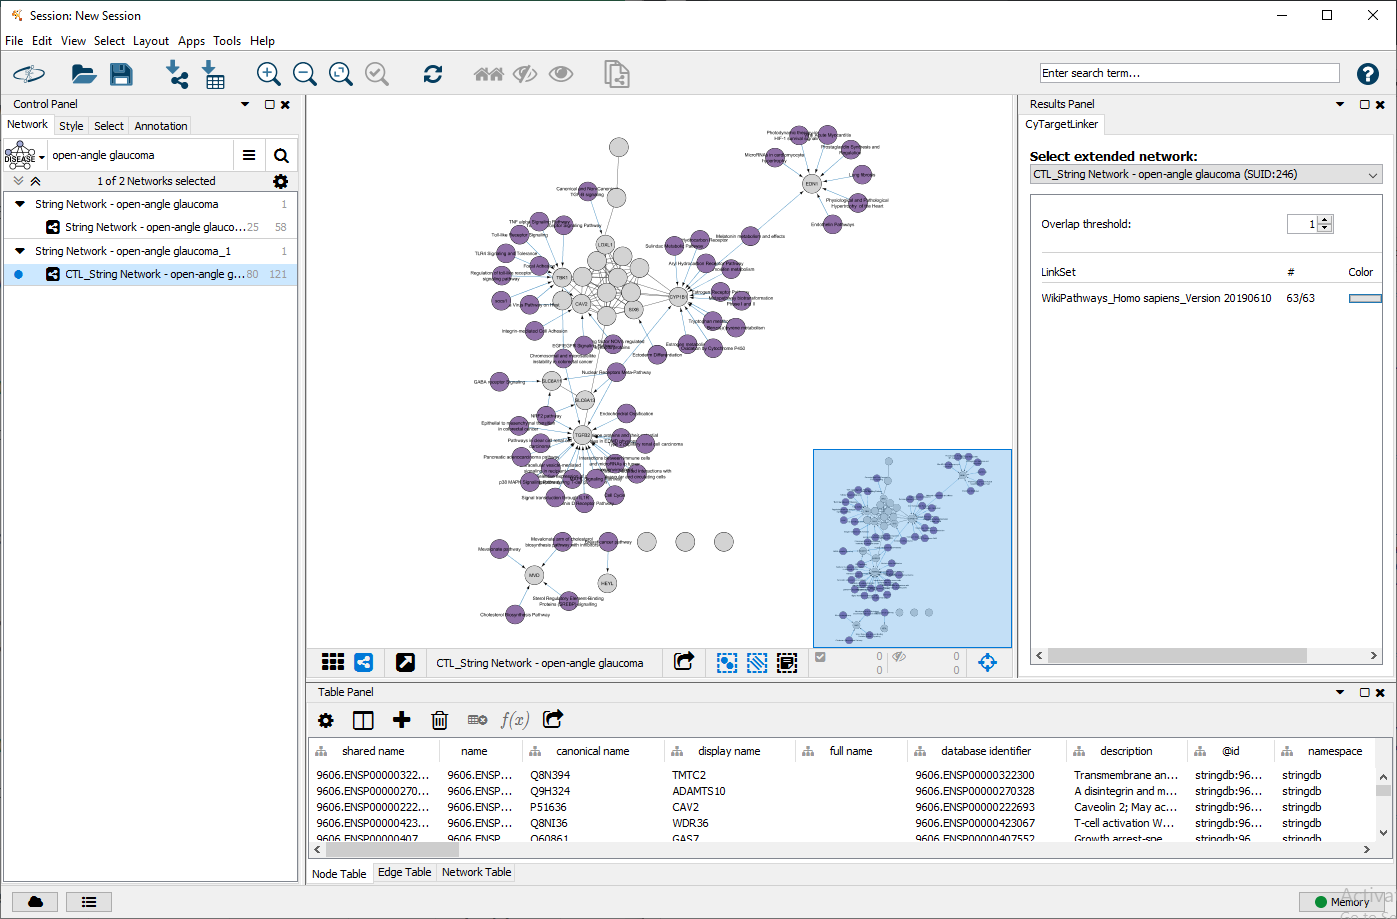 Figure 6 |
Step 5: Adapting the visual style
Fix node labels (some of the initial nodes may not show any node labels):
- Go to the ‘Style’ tab and click on the mapping for the ‘Label’ property.
- Change the column from CTL.label to ‘display name’.
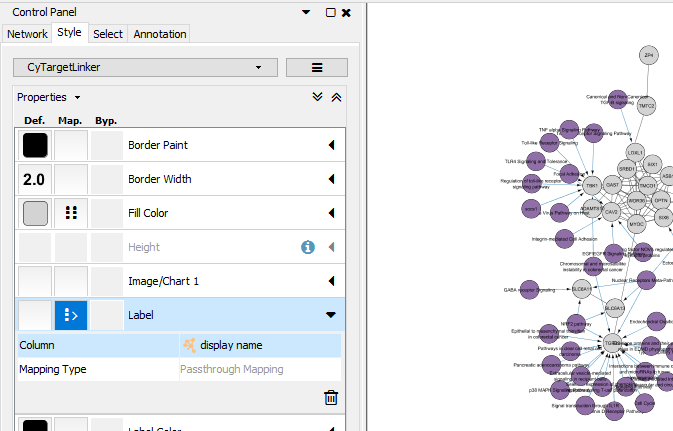 Figure 7 |