Tutorial 2
Extend a biological pathway with regulatory information
CyTargetLinker provides a quick and extensive enrichment of biological networks in Cytoscape. The visualization options allow biological interpretation of complex regulatory networks in a graphical way.
In this tutorial a step-by-step explanation is given on how to extend a pathway from WikiPathways with regulatory information in Cytoscape.
This tutorial has been created with:
- Cytoscape v3.7.1
- CyTargetLinker app v4.1.0
- WikiPathways app v3.3.7
Step 1: Install required apps in Cytoscape
- Open Cytoscape
- Go to the app manager: Apps -> App Manager
- Install the WikiPathways and CyTargetLinker apps
Step 2: Load pathway from WikiPathways
- In the search bar in Cytoscape, select the WikiPathways app and search for “Cholesterol Biosynthesis pathway” (with quotes).
- Select the correct pathway (WP197) and click ‘Import as Network’.
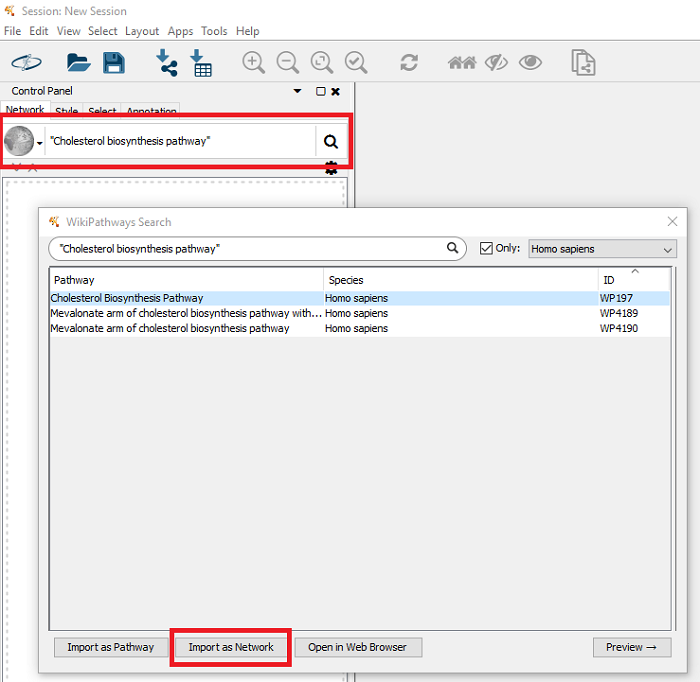 Figure 1 |
The pathway is now imported as a network (layout and graphical elements are removed, redundant nodes in the pathway are merged), see Figure 2. The WikiPathways app already performs an identifier mapping step automatically and adds an Ensembl column with the representive Ensembl identifiers for all genes in the pathway. As long as the linksets support Ensembl, no further identifier mapping steps are required.
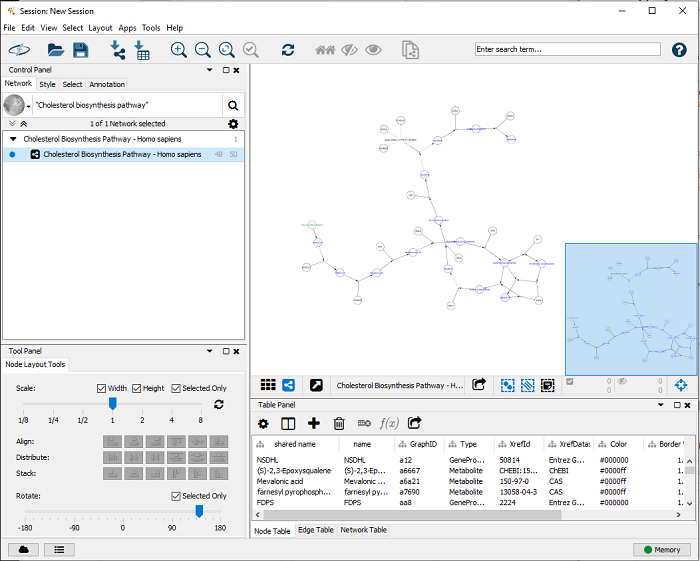 Figure 2 |
Step 3: Download relevant linksets
A link set is a network containing additional information and links about nodes in the network. This could be regulatory interactions like microRNA-gene or drug-target interactions. The networks are stored in XGMML (the eXtensible Graph Markup and Modeling Language) format, which is supported by Cytoscape. Each link set contains interactions consisting of two nodes, source and target, connected through one directed edge. Several link set for different use cases, species and interaction types are provided on our website, see Figure 3. CyTargetLinker is not limited to the provided link sets. A user can also easily create their own link sets.
Before starting CyTargetLinker you need to download the link sets of interest and store them in a directory. In this example, we will use TF-target and drug-target interaction link sets from ENCODE and DrugBank, respectively. All three link sets are available from the website, but for the tutorial, you can download a zip file containing both link sets from here.
- Download the zip file and unzip it so both xgmml files are in the tutorial2-linksets directory.
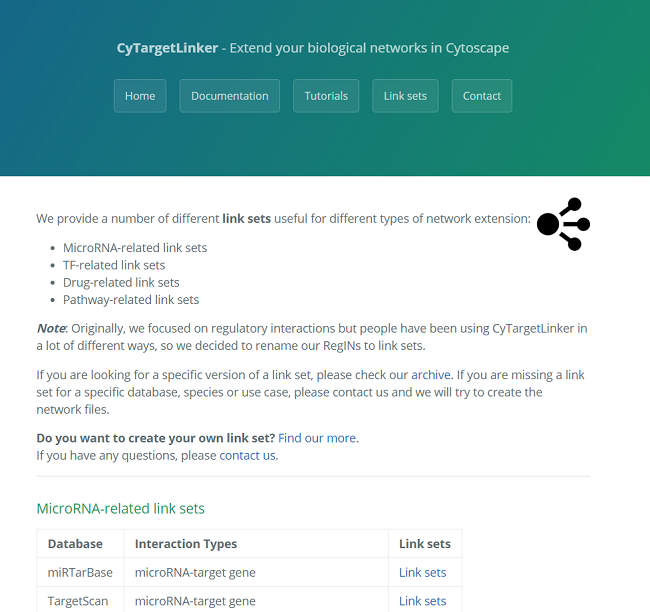 Figure 3 |
Step 4: Extend pathway with regulatory information
- Go to ‘Apps -> CyTargetLinker -> Extend network’ (see Figure 4)
- Select the correct elements in the drop-down boxes for user network and network attribute. The user network is the network you want to extend. The network attribute is the column that is used to identify the entities in the link set and needs to contain one of the supported identifiers. The TF-target and drug-target link sets support Ensembl identifiers, so we can select the Ensembl column.
- Browse to the downloaded tutorial2-linksets directory to select the link sets used for extension.
- Select ‘BOTH’ as direction, indiciating that you want to add possible regulatory and target nodes for the elements in the pathway.
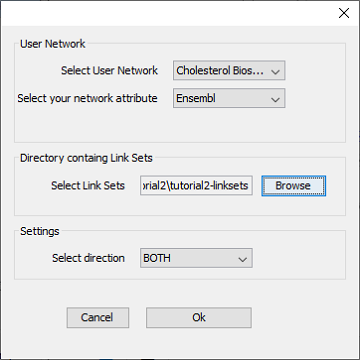 Figure 4 |
After clicking ‘OK’, you can select which of the link sets in the folder should be used - in this tutorial, we will use all three available link sets in one extension step (Figure 5).
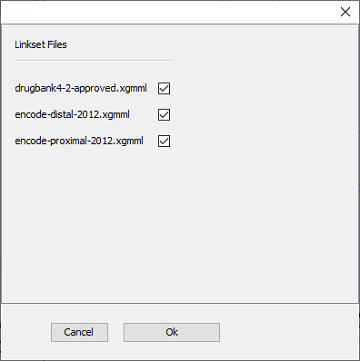 Figure 5 |
After the extension (this might take a littel while depending on the size of the original network and link sets), the extended network is visualized in a new Cytoscape network, as shown in Figure 6. Go to ‘Apps -> CyTargetLinker -> Show result panel’ to see how many interactions are added from which link set. For the current extension 17 edges from ENCODE distal, 50 edges from ENCODE proximal and 17 drug-target interactions from DrugBank were added. The edge color indicates from which link set the interaction was added (blue for ENCODE distal, red for ENCODE proximal and purple for DrugBank).
Drugs are shown in purple and transcription factors in blue. All elements from the original pathway are gray.
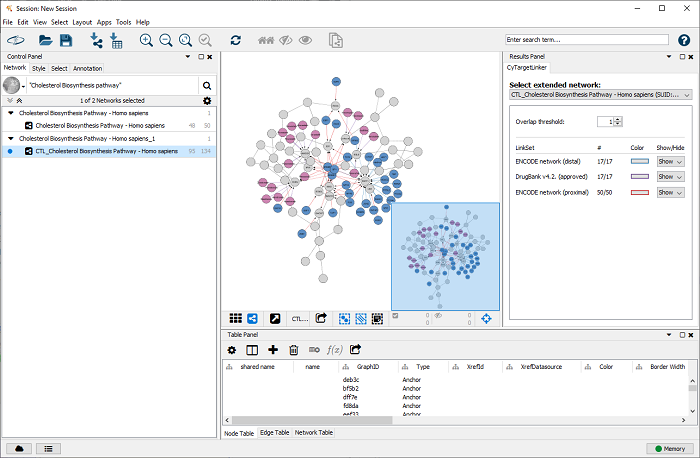 Figure 6 |
Step 5: Adapting the visual style
Fix node labels (some of the initial nodes might not show any node labels):
- Go to the ‘Style’ tab and click on the mapping for the ‘Label’ property.
- Change the column from CTL.label to ‘name’.
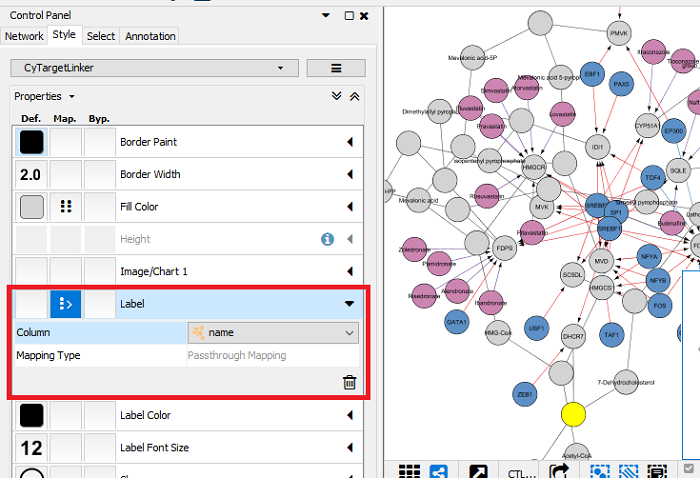 Figure 7 |
Resize group and anchor nodes (pathways contain hyperedges that are solved by adding group and anchor nodes):
- Go to the ‘Style’ tab and create a mapping for the ‘Size’ property.
- Select ‘Type’ as the column and define a ‘Discrete Mapping’.
- Define the size for ‘Anchor’ and ‘Group’ as 5 to only show them as connector nodes but not as biological entities in the pathway.
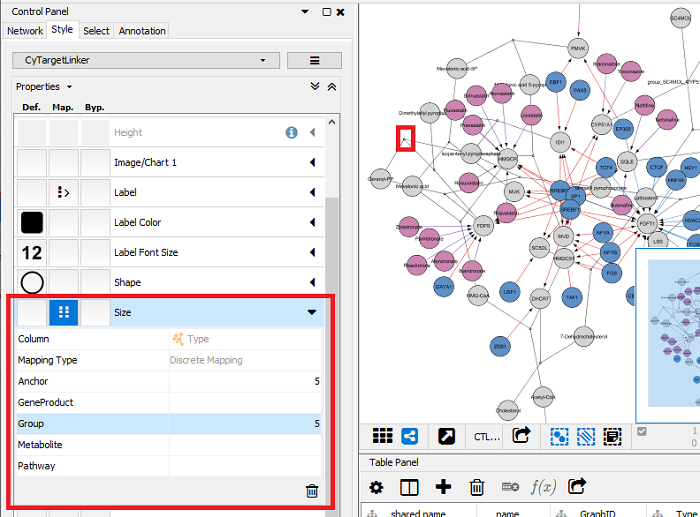 Figure 8 |